Managing Our Digital Photo Overload
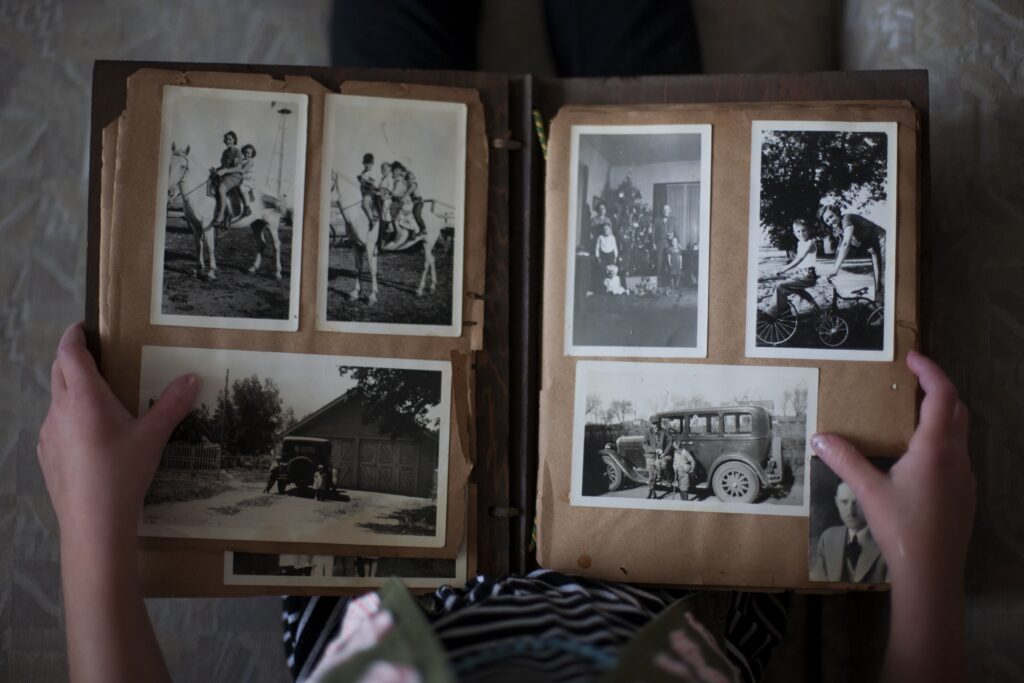
Before we had children, my husband and I used to make these beautiful, minimalist, old-school scrapbooks every year — like real, bona fide, print-the-photos-and-set-them-in-the-page-by-hand scrapbooks.
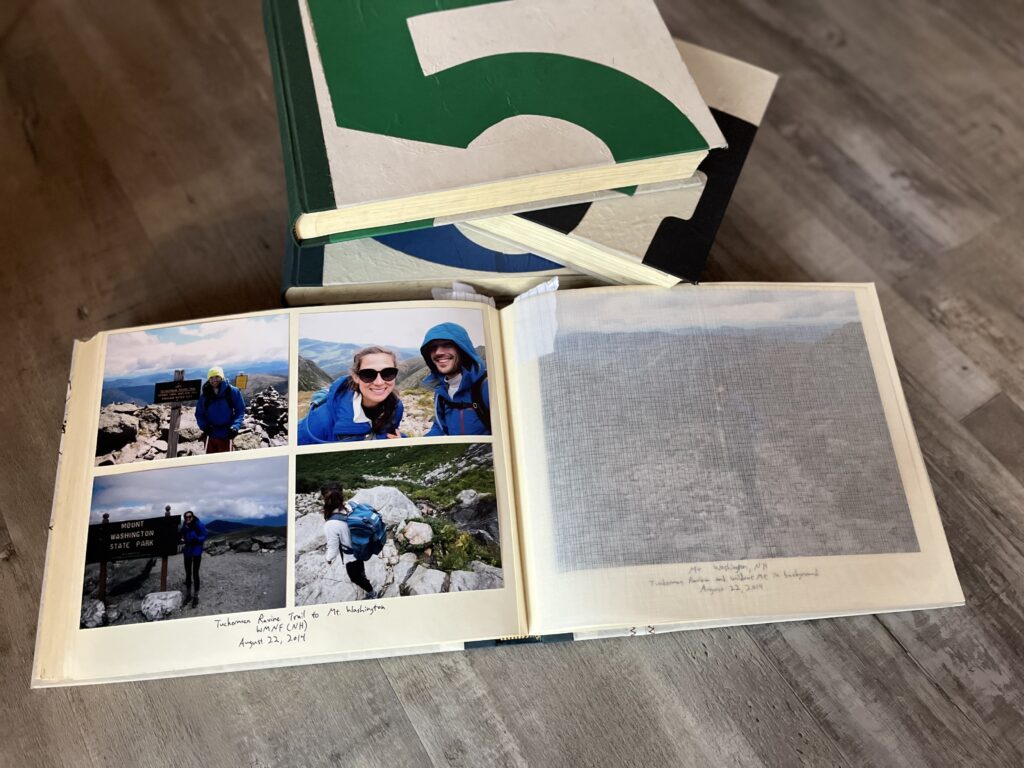
I won’t sit here and tell you it was fun — often it was my husband who ushered us through the sometimes-draining process, in fact — but it was doable. And we were (are) always so happy to have them.
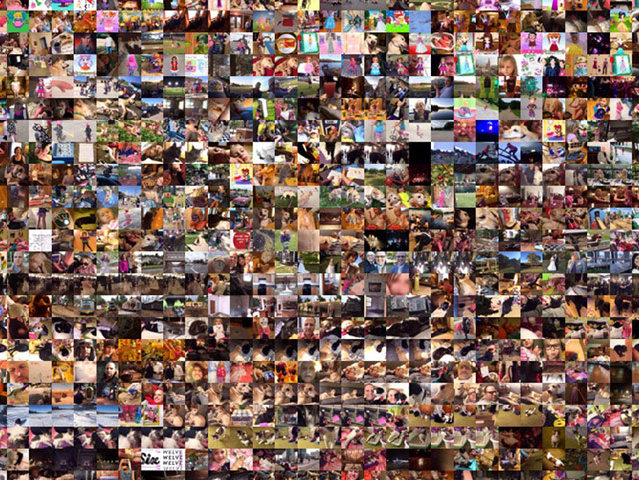
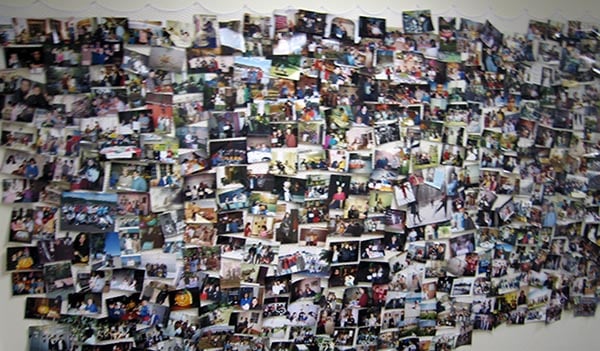
Now, seven years and two kids later, to say that we have fallen off the wagon would be… a gross understatement. We have more pictures than ever, more moments to remember, more memories to encapsulate, and absolutely nothing to show for them.
Nothing, that is, except a stressful and steadily-mounting digital hoarding “situation”…
When our team started talking about this^^, there was a lot of nervous, yes yes nodding. Uncomfortable shifting in seats. And silence.
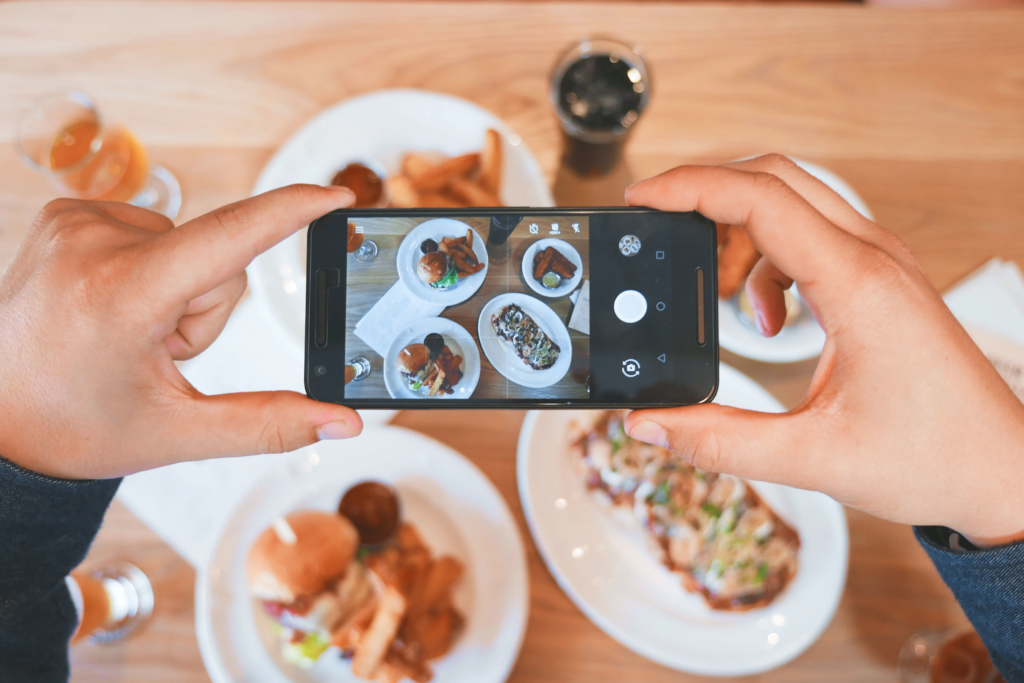
I mean seriously, what the f*ck are you supposed to DO with all the pictures? And the videos, omg. Where do you store them? (Because I keep upping my iCloud storage and vowing I’ll “figure something out” before the space runs out, only to repeat the process again six months later…) How do you cull them? (Because is it really worth it to have eight thousand photos? Or ten thousand? Or twenty?) When are you supposed to even look at that many pictures?
How are you supposed to enjoy them?
I’ve read that looking at photos can be an immediate mood boost, a quick hit of happiness — and I get that, really. But honestly, these days, looking at pictures (an activity which by default must take place on my phone) just makes me feel stressed and overwhelmed. Every photo is a reminder of both the extent to which I have failed and the enormity of trying to dig myself out of a seven-year memory pit.
Plus, to me there is something very different about flipping through an actual album compared to smartphone scanning, the latter of which can quickly begin to feel akin to social media death-scrolling.
There are SO many reasons to do something about this situation (how much time do you have??), but the standout (IMO) is this: I want to memorialize our life as a family in a way that is actually accessible and MANAGEABLE and that we can, in fact, enjoy.
This year, I’m promising myself: I’m going to do something. It will not fix the last seven years; and it will not be perfect, but it will be better than nothing. Because having the photos is less important than what I choose to do with them.
So — what do I do with them?
________
Photographic Excess In the Digital Age
To be fair, the problems of excess and unmanaged photographic media are not necessarily unique to the digital age (anyone else recollect boxes and boxes and boxes of unorganized and seemingly random photos in their grandparents’ basement??) — but the extent of the problem is undoubtedly… mounting.
With the advent of smartphones, more people are taking more pictures than ever before. It’s a truly exponential growth rate, and the literal increase in photos taken in recent years is staggering: we snap more than a trillion photos annually, compared to some 80 billion twenty years ago. One Boston-based digital organization company told the New York Times that their average client had 15,000-20,000 digital photos… Or, like Charlene, 68,027.

Oh good, I’m not alone in this.
We’ve put together the best tips and advice culled from experts, professional digital content organizers (this is a thing?!?!) and super-parents-who-actually-do-sh*t-with-their-pictures. What follows is equal parts how-to and inspiration (read: do as I say, not as I do). We’re all in it together, friends…
Deep breath.
Oh, wait. First, two notes:
– There are really three separate steps involved in clambering out of the picture swamp:
- Backup & Storage
- Ongoing Curation
- Preservation (aka, commemorating your photos in whatever way best suits you and your family)
Though all of these steps are equally important parts of the puzzle, we will focus on curation and memorialization here, that is: coming up with an achievable, ongoing system for culling and organizing your photos so that you can actually retrieve and use them in a meaningful way.
The “backup” question (#1, above) dovetails closely with the tech world — if you’re looking for more on that, we suggest checking out these resources to get started:
- Miss Freddy’s photo organization courses: Conquer Your Photo Overwhelm (~$15) is an excellent and straightforward primer on getting your sh*t together with photo backup; and Backup Bootcamp (~$99) is a more in-depth tutorial on getting everything squared away. *Use code LUCIE at checkout for 10% off any of Miss Freddy’s digital resources. *No, we are not being paid to recommend these ^^
- A Beginner’s Guide to Backing Up Photos, via The New York Times
– Photo organization…
This part sucks. It just does. There’s no getting around it and we’re not going to try to. (If you’re looking for a rose-colored pep talk, you won’t find one here….) The truth is, going through your photos is a formidable task — but it need not be daunting.
- The key is recognizing up front that it will require some buy-in time (for me, there are a lot of parallels with meal planning, which I assumed would be “easy” and take approximately 90 seconds but which in reality takes *actual time);
- and also an ongoing commitment to sort/organize your photos in a way that makes sense to you, so that you can access and use them easily.
There are some ways to set yourself up for (easier) success, but my point is: this is not a “once and for all” or “one and done” kind of endeavor. Once you do the culling, you have to keep doing it.
Professional photo organizers liken it to any room in your home: you have to keep it up, it doesn’t just “take care of itself.” In other words, commitment to maintenance is key.
Personally, I think coming to terms with this simple reality — that keeping and growing an organized photo library demands time — was half the battle.
Okay, phew. Now, let’s go:
An Opening Question (Yes, It’s Personal)
It’s worth spending a few minutes thinking through some questions:
- Why are you taking photos? What do you want your pictures to “do” for you?
We all take pictures at different times for different reasons. It may be to mark a special moment in time, to share with family members, to commemorate something, put on social media, encapsulate the day, or any number of other reasons (the fear of forgetting comes to mind, for example).
None of us has one single overarching reason why we take pictures. When my kids were little, I made a huge point of taking pictures when they had tantrums so that my family and I knew and remembered what things were *really like with toddlers on a day-to-day basis, hah. I may be alone in this habit^, but it is helpful to consider your own reasoning for taking pictures broadly as well as in any given moment, because doing so can help you be more mindful about building (and paring) your collection.
IOW, having some sense of purpose with photo-taking can help you make decisions not only about when to take pictures, but also what to take photos of, how many to take (or keep), and where to put them, etc. Remember film? We used to only have 24 photos per roll, so we were forced to be much more mindful about snapping photos — reclaiming some slice of this consciousness is what we’re after.
- What kinds of media do you want to use to display your photos?
I am an old-school photo album fan, but everyone has their own preferences. There are so many different ways to present (and remember) your pictures: digital frames, social media, shared digital frames or albums, actual photos, hard copy books, etc. Knowing what you plan to use for exhibiting photos is useful at the outset. (We have some recommendations in various categories here, which we’ll get to…)
Three (Easy) Steps to Managing Digital Photos
A. Start Today — and don’t look back in time (yet).
To begin, think about starting fresh and moving forward. Personally, every time I have ever endeavored to get my pictures in order (whatever that means), I have hit a brick wall because the task in its entirety is just so MUCH.
This time around, by committing to a new practice — namely, implementing a management system I could implement in the immediate — I was able to get ahead of myself without getting overwhelmed. Once I got in the habit of taking care of my digital content on a regular basis, I started to backtrack (more on that in a minute — you have to break it down into bite-sized chunks), but in the interest of building some momentum, I chose to start NOW. As in, today. And go figure, it worked.

In short: begin where you are, and don’t worry about what’s past.
I’ve learned that “dealing with” my digital photo problem is not a one-time event — it’s a habit and an ongoing practice.
B. Cull as you go.
This. This is the hard part, friends — but it makes SUCH a huge difference. And once you build it into your routine, it’s truly not very onerous.
Here’s what to do: decide on a regular interval of your choosing to select the photos you want to commemorate — it could be something you do in real time, a nightly ritual, or a weekly or monthly thing. The task is this:
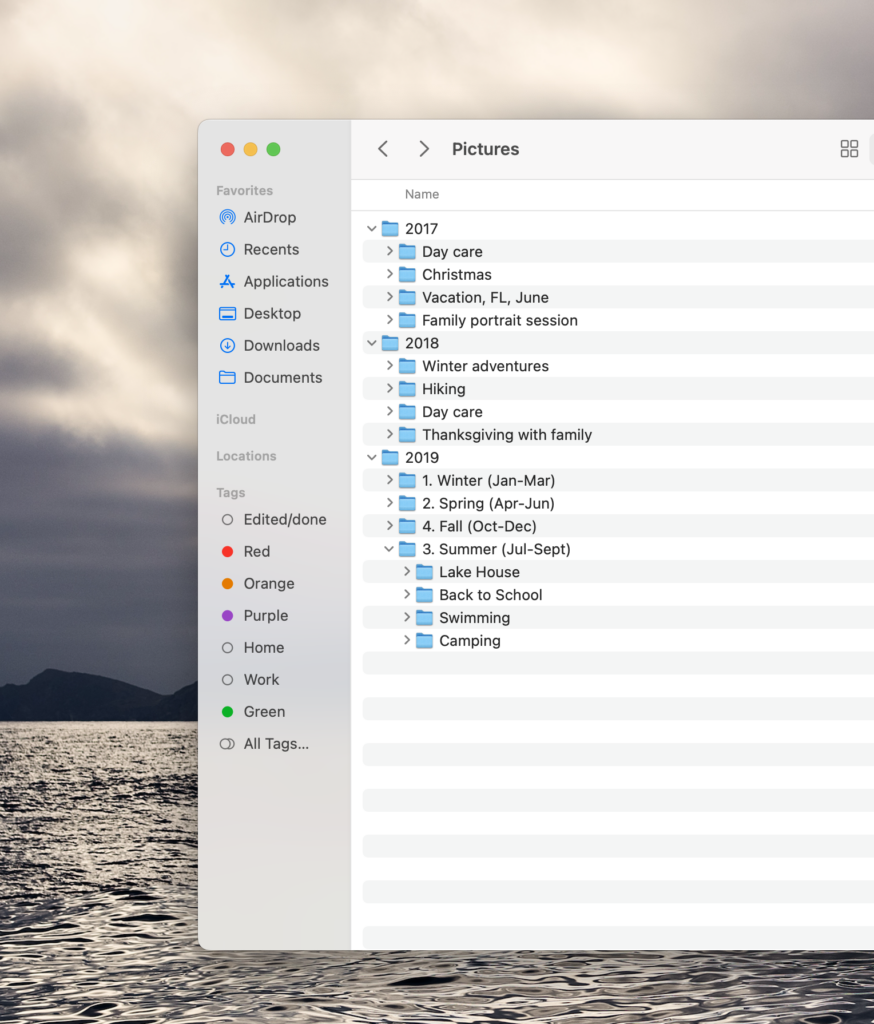
- Create a folder or album to set aside the pictures you want to “use” (put in a photo album, add to your digital frame, etc.) and label it something super straightforward like: “Photos for Album” or “Winter 2023” or “Ellis Family Vacation, Tucson 2022.” You may have one such folder/album (many like the idea of making a single annual family yearbook), or several (for various special events, separate children, and/or multiple albums per year).
- Pick a time — again, the interval can be whatever you prefer. I opted to make this a Sunday ritual, because it just seems like a Sunday kind of chore… And I also invited my two kids to look along with me. Now, it’s a fun and relatively brief activity we enjoy together.
- At the appointed time:
- Go through your pictures and delete duplicates, mistakes, screen shots, and other unnecessary photos you no longer need;
- Try to reduce where you can — if you have 17 of roughly the same picture from an afternoon hike, for example, do you need all of them? Could you pick just one or two of the best photos? Sometimes this piece comes easy and sometimes not so much… it’s kind of like our children’s artwork, which comes home by the armful and we want to save all (or most) of it, but do we really need to keep every piece?
- Put the photos you want in your new album(s)/folder(s) for safekeeping.
Optional: If you are someone who likes to have your photos labeled, this^^ is the time and place to do so — most devices track the date/time and location of pictures automatically (depending on your settings), but if you’d like to add notations such as: NYC Vacation, Joy’s 5th Birthday Party, New Years 2023, and the like, get those items in there now!
BTW — once you build the habit of going through your photos routinely, you may want to begin the process of going through older photos. *Let me tell you: you are much more likely to meet success if you break things down into manageable chunks! Depending on how many photos you generally take, the timeframe for a “manageable chunk” may vary. I am rather streaky as a photographer, but I have found that setting aside an hour to go through roughly 3-6 months at a time tends to work well for me. In fact, breaking things down in this way has been much more efficient and productive than I anticipated — I’ve already gone through two years of my backlog.
The Automaticity Option: Using Technology
Weeding out photos, comparing similar pictures, and sifting through useless screenshots and other random images cluttering your library can be tedious and time-consuming.
If you don’t have the time or mental space to play Marie Kondo on your phone, there are apps that can do the bulk of the work for you. These applications aren’t without their problems, but if the sheer volume of images you have to sort through makes you want to crawl back into bed, they can seriously be a godsend.
Apps like Gemini Photos, Smart Cleaner and Slidebox will scan through your photos for clarity/focus and other favored features (like eyes open and smiles) and suggest which media to keep. You can check out a comprehensive list of phone decluttering apps here.
Of course, the trade-off is that you need to be okay with delegating and forfeiting some of the control. Photo-sorting apps may choose, for example, to delete pictures you would choose to keep (e.g. sometimes, for memories’ sake, we’d rather have the funny photo with the closed eyes and awkward grimaces than the picture-perfect smiles). If you’d like full control, then there’s no way around it: you’ll need to do it manually and commit to some sort of ritual/routine.
Some Storage Notes:
This article doesn’t delve into the storage/backup problem, but for almost all of us it is a real PROBLEM. (This is yet another reason why culling your photos regularly — and getting rid of excess/junk pictures — is worthwhile: it frees up storage space.) Here are a few quick tips that may help you reduce the amount of space your photos take up on your devices:
- iPhone users: when you delete photos on your phone, they end up in the “Recently Deleted” folder. You need to empty that folder to actually reclaim the storage space that those photos are taking. Your phone automatically deletes the photos in the Recently Deleted folder, but if you’d like to do it manually, go to the folder, tap “Select” and then hit “delete all.”
- In your iCloud settings: make sure you have “optimize iPhone storage” selected (toggled to “on”). This setting will retain all your images and videos at full high resolution in the cloud but compress them into space-saving files on your device.
- In your Camera settings: if you want to save storage, go to “formats” and choose “most compatible.” For videos, opt for the 720p HD at 30fps setting. Note that the quality of images won’t be as great as if you were to choose higher resolutions. Finally, go to “Preserve Settings,” and enable “Live Photo” all the way at the bottom. Once you do that, go to your Camera app and turn off the Live setting, which takes more room on your phone.
- Clear out old text messages — when I checked my iPhone settings to see what was taking up how much space on my device (you do this through Settings > General > iPhone Storage), I was floored to see how much space my text messages took up. Consider deleting threads or changing your notifications to delete text automatically after 30 days.
- Check your storage recommendations to free up space: on an iPhone, go to Settings > General > iPhone Storage, and Apple offers recommendations for ways to clear up space.
Getting Your Sh*t Together: LL Reader Tips on Culling Photos
- “I search the day each day of the year. It brings me to the pictures from that day for all the years I’ve had the phone. Then I go through and delete!” ~ Jamie M.
- This^ is GENIUS — just think: by the end of one year, you’ll have gone through all the photos on your phone!
Psst, if you’re like me and completely technologically challenged, here’s how you do this^^ (I seriously had to look this up, LOL): Open your photos app on your iPhone and from your full library, choose the search option. Type in the date and then tap “see all.” That’s it!
Another option to expand on this strategy is to go one step further: if you, like me, have a backlog of YEARS to sort through, consider creating a separate folder/album for all the years you have to make up for. *Then, as you go through “today’s pictures” from years past, you could also choose the photos from any given year you want to add to an album. It will be slow going, but by committing mere minutes a day for the full year, you’d have all the desired photos from [insert number of years missed here] organized to use in an album.
- “Daily I delete doubles/blurry/unwanted photos; monthly I select favorite photos and add to a yearbook album; yearly I print our family yearbook and some favorite photos… I also keep photos organized by having albums on my phone for categories like Vacations, School, Photoshoots, Kid Art, and I save screenshots to Files rather than having them mixed into photos.” ~ Amy Coleman De Long
- Set an alarm/reminder on your phone for whenever you want to go through your photos (*make sure you choose a time when you’ll have time). This way, you don’t forget and suddenly find yourself in the position of (again) having months or years worth of photos to review. With a reminder/alert, the task is literally built into your schedule.
- “I use the Favorites button to narrow down the best of multiple pics (from the same poses, or from the same day or activity), then I use a private IG account to share Favorited photos with a caption describing what the photos are from. The account helps family who don’t live nearby see what we are up to… and I have the IG account linked to Chatbooks.” ~ Erin Berg
- “I put my favorites for each year in a folder and then at the end of the year I create a photo book with the photos. We go back and look at the books often and it’s a great alternative to large photo albums.” ~Katie L.
C. Pick Your Poison
Once you get in the habit of going through your photos, it becomes SO much easier to actually use them in a way that serves you. As we’ve mentioned, everyone has different preferences when it comes to commemorating your photos — but regardless of whether it’s some kind of digital display or a hard-copy book, it’s imminently easier to do so if you already have the photos you want to use selected.
Yes, in fact, it all boils down to this: if you do the work of managing and “favoriting” your photos on an ongoing regular basis, memorializing your photos is vastly more achievable. It’s about STREAMLINING THE PROCESS, friends.
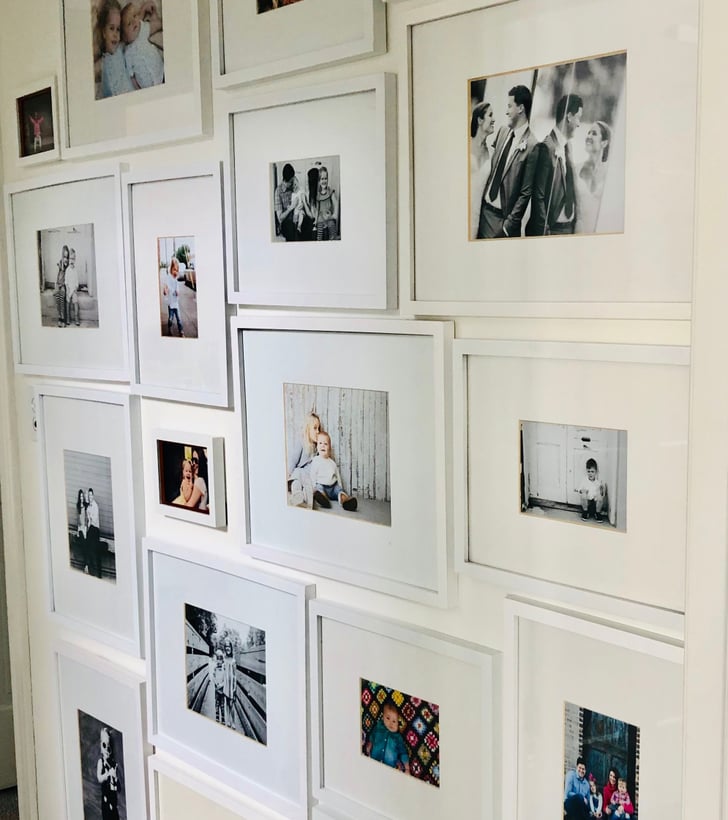
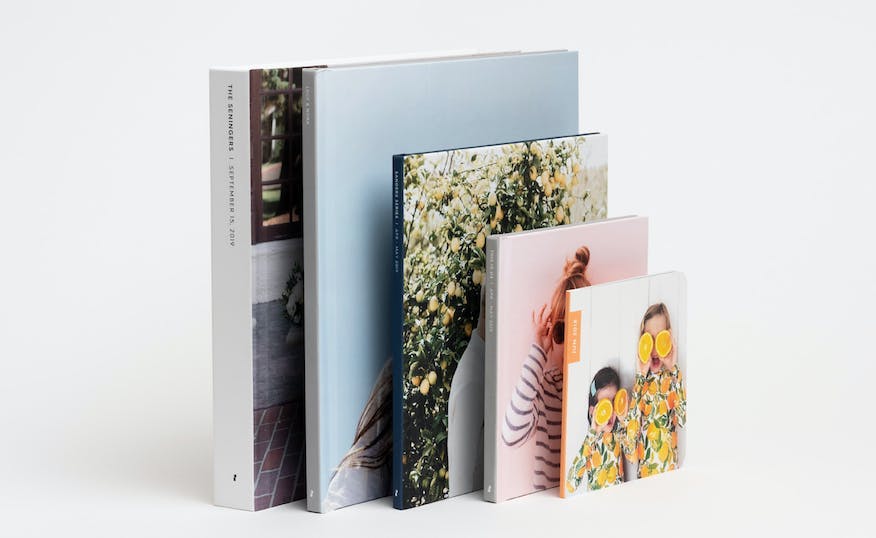
Ready to memorialize your photos? You can print photos and stick them in a traditional scrapbook, but if you’re not crafty and/or don’t have time to make photo albums from scratch, you can turn to digital frames and photo album websites for help.
Here are a few photo-printing and framing options to help turn your digital memories into more tangible ones straight from your phone/computer:
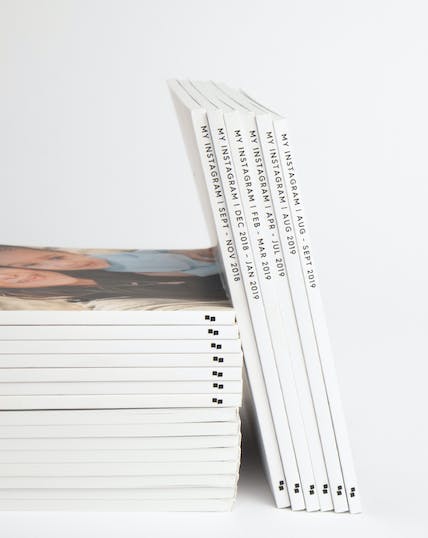
Chatbooks — Best for IG Users
Chatbooks was created with phones, and more specifically social media, in mind. The app lets you turn your Instagram grid into a photo album: it connects to your Instagram account and pulls your posts directly into 60-page photo albums. If, like me (Charlene), you already document your life on the social media platform, the Instagram series, the app’s original offering, is by far the easiest and quickest way to get your memories off your phone and into your hands. Since then, Chatbooks has extended its services to include photo albums for special occasions and subscription-based photo books, but it’s remained very straightforward to use. The customization is rather limiting, but if you’re after ease of use, that won’t be a dealbreaker. Chatbooks’ customer service is also absolutely stellar.
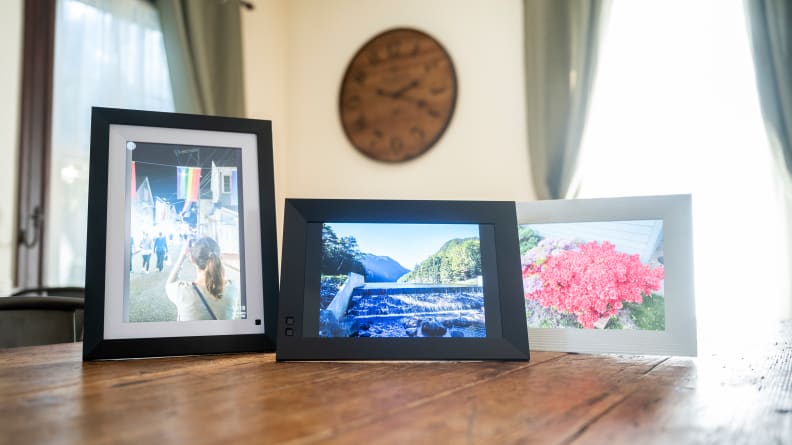
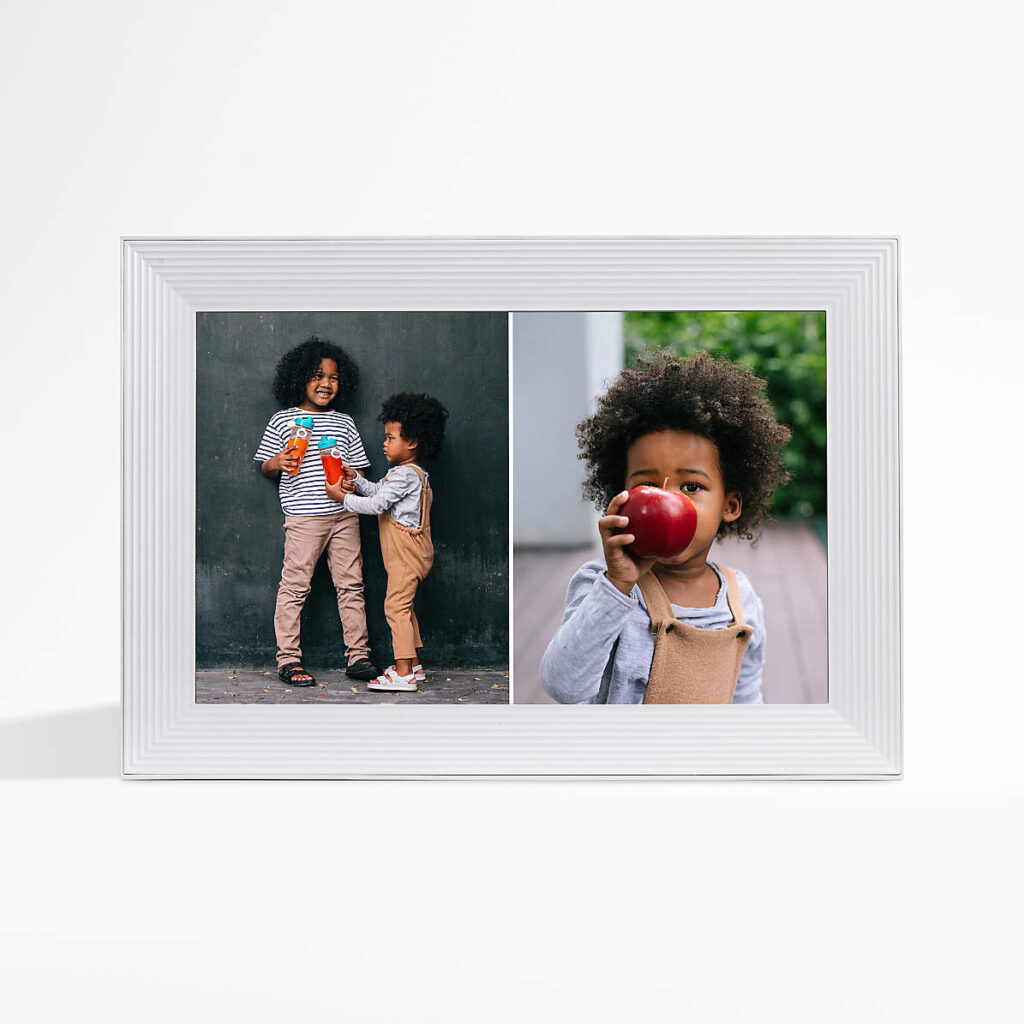
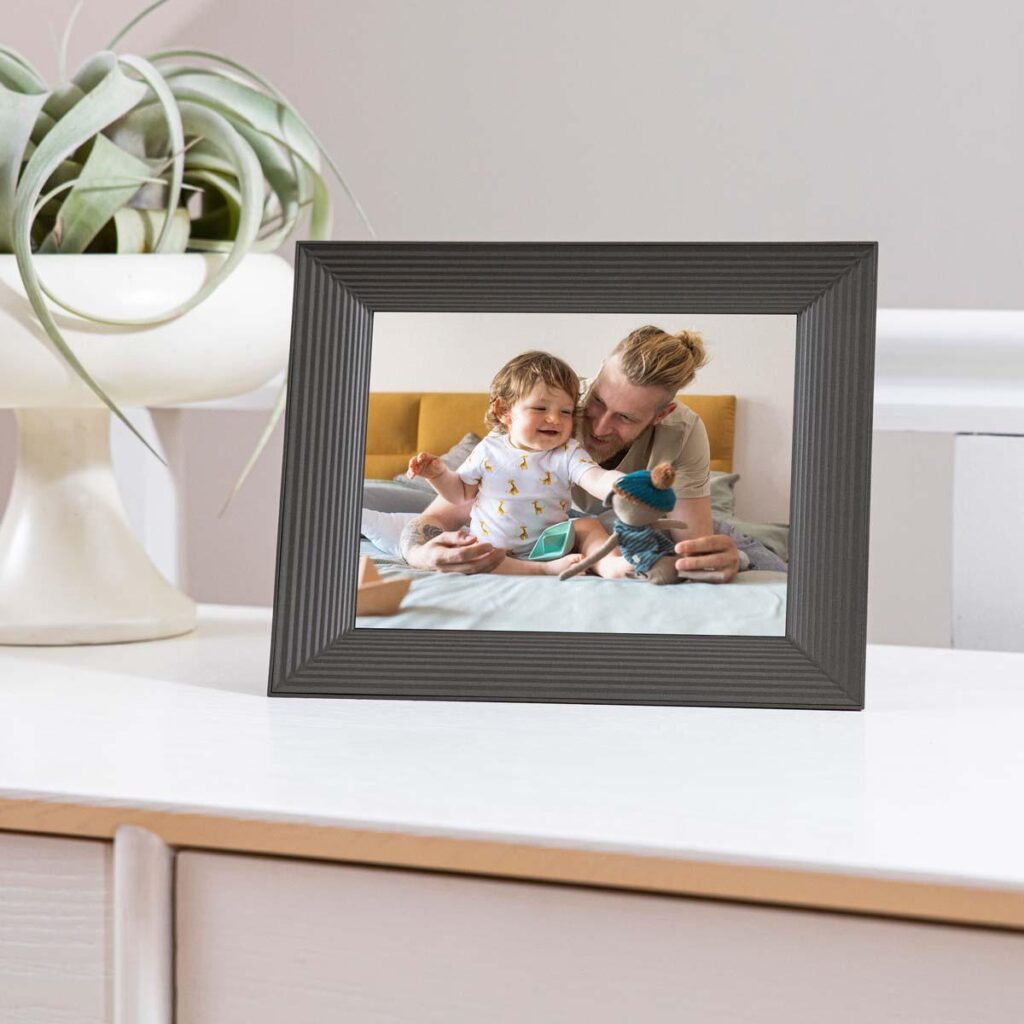
Aura Digital Frames — Best for Digital Display
Aura frames have made all the best-of lists, and for good reasons: they feature a high-quality display, have unlimited storage space, and are incredibly easy to set up and to share with family members from the comfort of your own phone. (This is a great gift for grandparents because you can easily share photos — akin to a shared album on an iPhone — but the photos are added to the frame’s picture rotation rather than just a phone album; plus, multiple family members can add the app to share images.) We love, too, that the frame is stylish and doesn’t look like a computer. Nixplay is another great frame with solid security measures like encrypting photos during transfers.
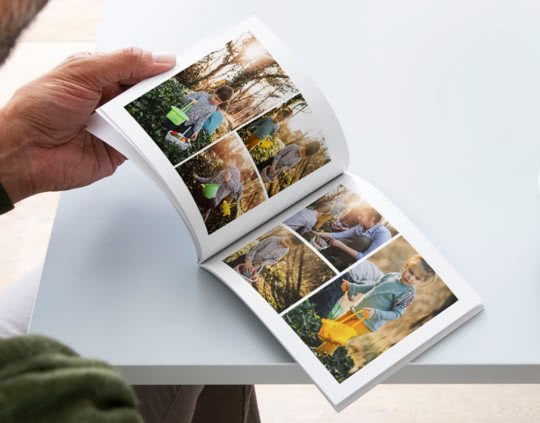
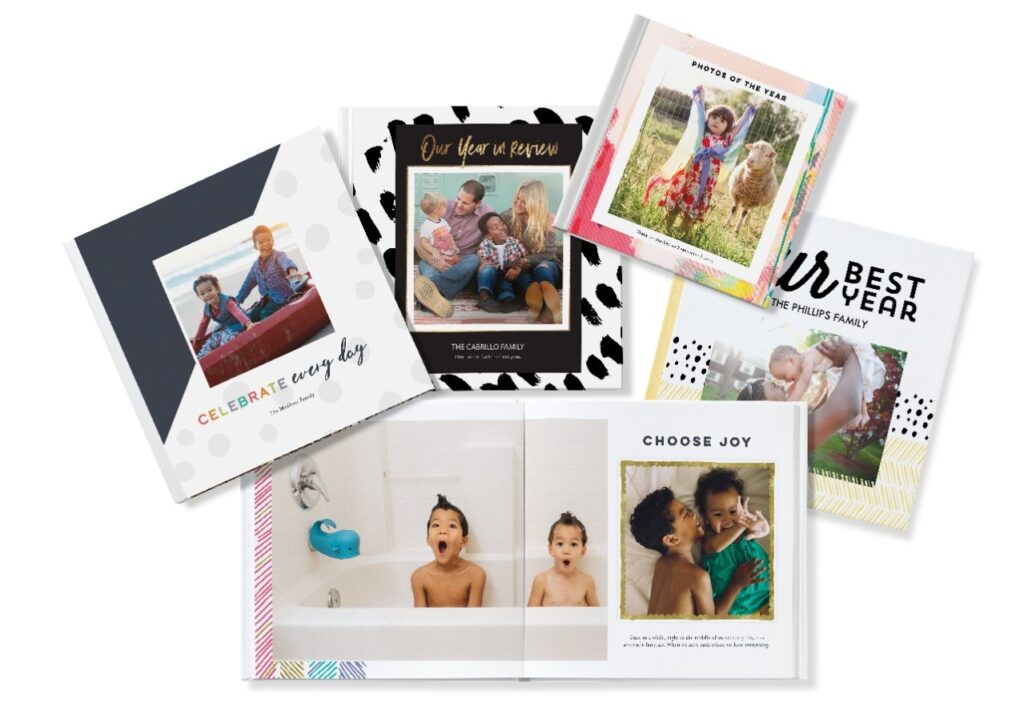
Mixbook — Editor’s Choice
Mixbook is our overall top pick. The photo albums are high quality with great color, and the user interface is pretty intuitive. You can select photos from different devices/locations (a computer, phone, social media, etc.) and choose from dozens of preset options for layouts/templates to format your book. There is also an “autofill” option which will design a book for you, but this is generally either a love-it-or-hate-it feature. (Actually, for me, it’s both simultaneously — I love the ability but always hate how the autofill designs everything…) The upload takes a while (honestly, this is true of any platform), but we recommend using the option to upload an entire folder, and starting the process before you plan to step away from your device for a while. *These are relatively pricey at full cost, but if you keep an eye out for Mixbook’s frequent discounts (including 50% off your first book when you sign up for email), it really lowers the cost.


Shutterfly — Economy Pick
Shutterfly offers several photo books templates with design elements that make the creation process super intuitive, even for a complete novice like me. Each month, I choose the best photos I took that month and upload them onto the website and organize them by month/year. At the end of each year, I use those pictures to create a “Family Year-in-Review” photo album. Shutterfly does offer a “Make my book” option in which they create your album for you. This is an awesome option for those who don’t have the time or desire to make their own photo book. That said, I’ve never utilized this service simply because I like the control of doing it myself.
Snapfish, which has also been around forever, is like a poor man’s Shutterfly… it’s very affordable and you can either design your book manually or opt for the autofill, but the quality leaves something to be desired.
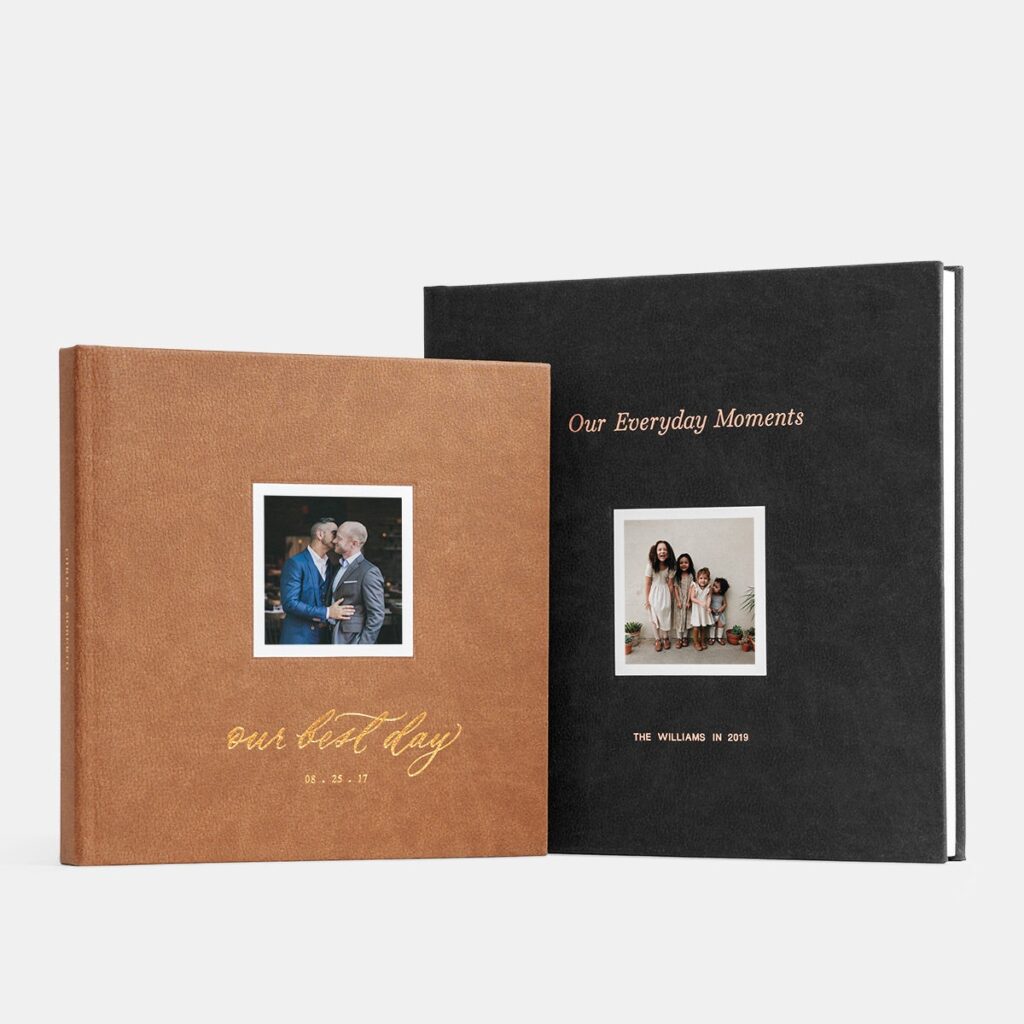
Artifact Uprising — Upgrade Pick
Artifact Uprising is known for its high-quality photo service and products. The site offers a large variety of premium photo book options, from layflat and scrapbook albums to softcover photo books to various framed prints. The materials are durable and luxurious; and the albums are highly customizable, making Artifact Uprising the perfect candidate to document life’s most special milestones and events, like weddings, graduation and trips. In fact, the website offers preset layouts catered to special occasions, which can feel limiting at times but generally makes the process of creating an album seamless and foolproof. The website also has an app that allows you to create projects directly from your phone. [Note that Artifact Uprising books have a 50-page minimum.]
Other options you may want to consider *if you happen to already be using these platforms for photo storage are Amazon prints and Google Photo Books, both of which are decent quality and relatively easy to use/follow if your pics are already there.
At the end of everything, putting together a selection of photos — whether it’s for an album, digital photo frame, calendar, or picture board — takes time. Sigh. And just as there’s no one correct way to review, organize, and assemble your photos, there’s no single platform that’s perfect. Each of these options^^ has clear pros and cons, so it may take a little trial and error to find what clicks with you.
All around, this is an enterprise where the adage “don’t let perfect be the enemy of the good” applies, hard core. Having an album for your future self and family to cherish is winning, friends — don’t forget it!

Thank you!
I have a related question. Since photos in my iCloud are deleted when photos in iPhone are deleted, Is there a recommended storage device to download my photos to (without losing them) so that I can then free up space on my iPhone?
No info for non-iPhone users?!
I really appreciate this article as I have been overwhelmed knowing “backing up/organizing my photos” has been on my to-do list for MONTHS and I’ve been needing some guidance on where to start!!!!
What about videos? 🙈