The Best Baby Food Maker & More
OK — now you’re all schooled up on how to make your own homemade baby food. The next step is to gear up.
Here’s the truth: there’s one standout “true” baby food maker that we love (skip ahead to The Beaba Babycook), but in reality we think that the best baby food maker takes on a number of different shapes and sizes, depending. In fact, it might not even be a baby food maker, specifically. Hah!
Another truth: there is very little you need for baby-food-making (and some of it you probably already have around your home), but there are a few things that streamline the process. Take or leave what makes sense to you:
Accoutrements:
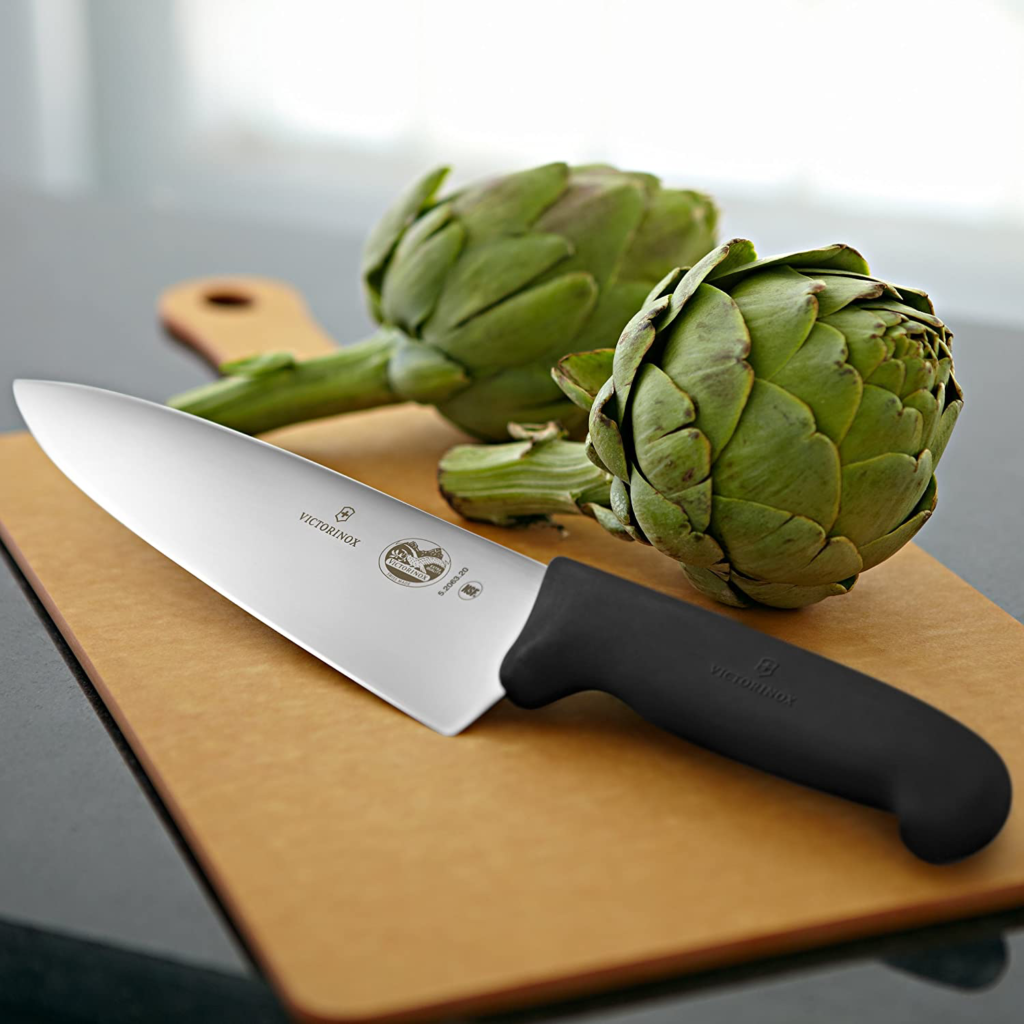
- A good knife, if you don’t already own one — we suggest the Victorinox Fibrox Pro (~$38).
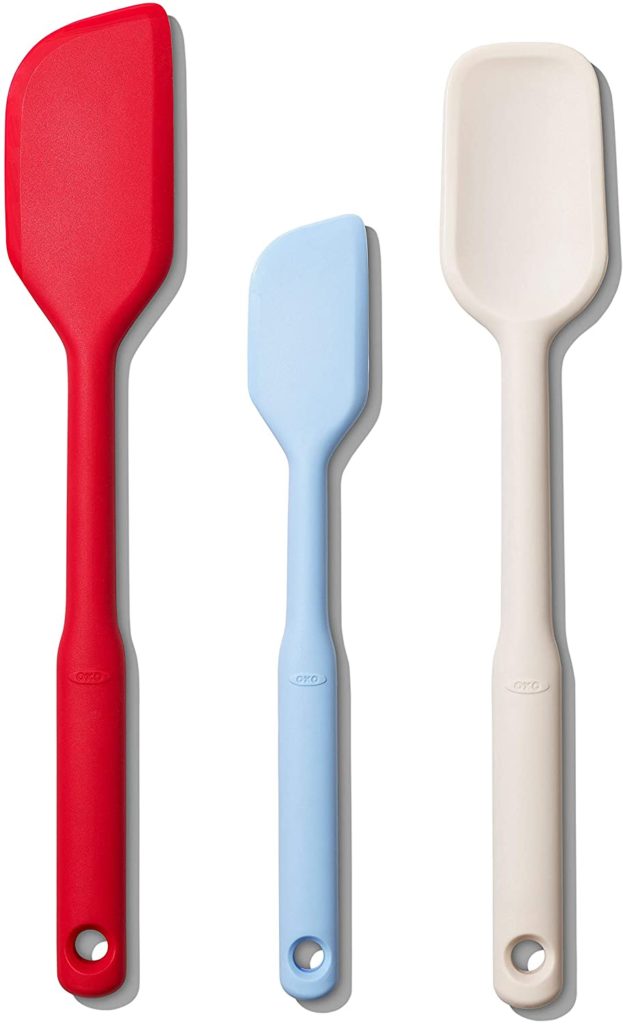
- A spatula — any ol’ one will do! We love this OXO set of 3 (~$20).
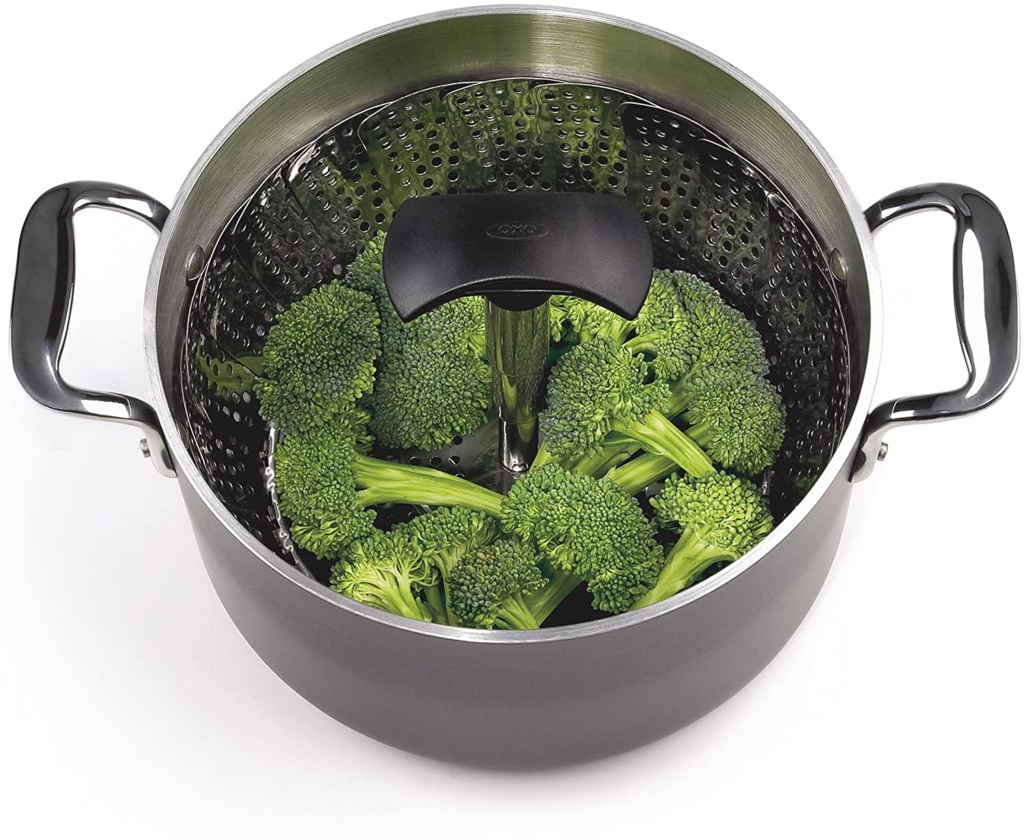
- A steamer basket — we like the basic OXO Good Grips Steamer (~$23).
A Blender or Food Processor
This one is a must, folks.
For the most part, we suggest using a “normal” product here (aka, not an “actual” baby food maker), because you will be able to use it longer than a few months, and you’ll have the ability to make more in any given batch.
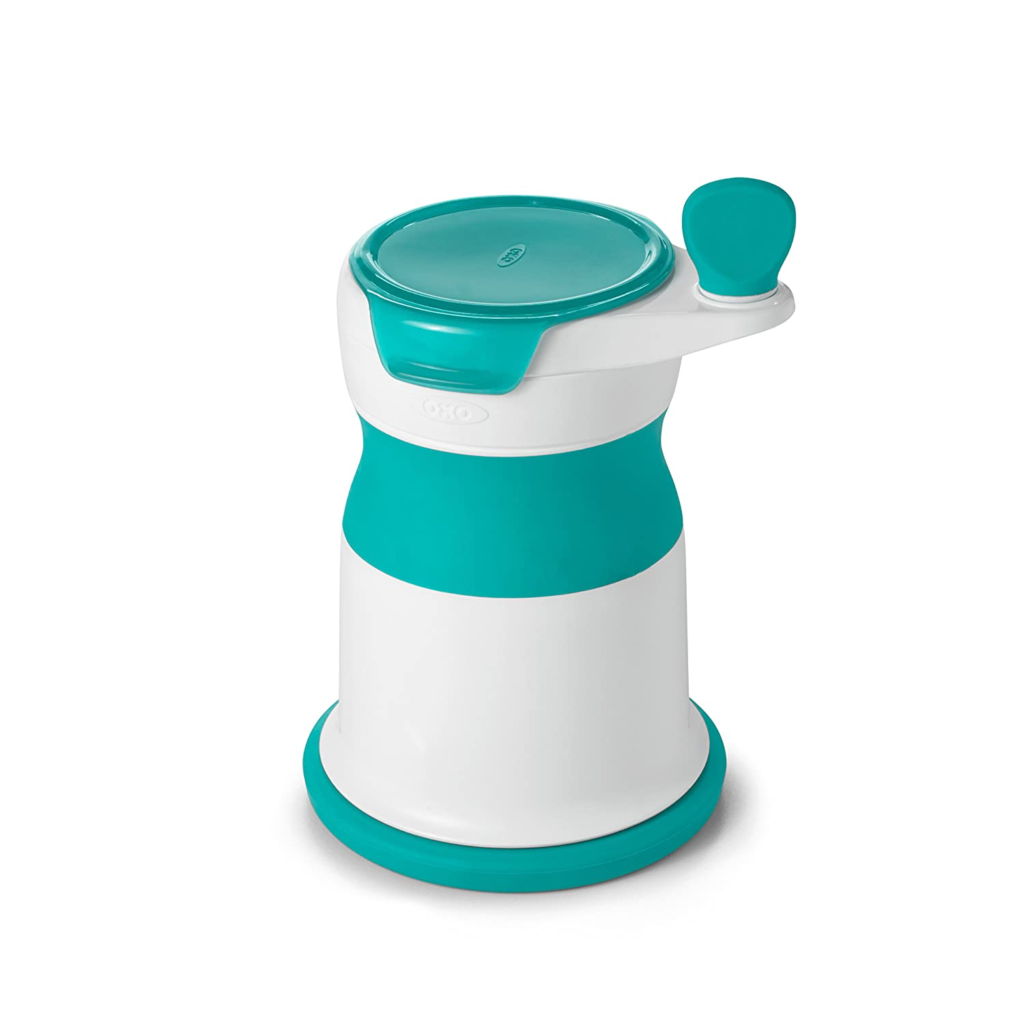
However, some parents prefer to make smaller batches of homemade baby food, and get well enough use from an all-in-one baby food maker — if you like to prep smaller portions and/or have limited space, this could be a great option.
Technically speaking, blenders are better for more liquid-y foods (think: smoothies) and food processors are better for more solid-y foods (think: salsas, nut butters); personally, for baby food purees, I prefer a blender. But it doesn’t really matter. You can make great baby food with either one — so if you already have one, use that.
Here are our suggestions, grouped into three budget-oriented categories and listed (roughly) in order of price, from lowest to highest:
Low-tech/Low-budget ~$
A food mill and an immersion blender are your super user-friendly, low-key options for your baby food maker. Both are great if you don’t anticipate needing a countertop blender or food processor down the road, and/or you prefer smaller-serving prep; they’re also ideal for those with little extra storage space for kitchen appliances, plus they’re handy for travel and for stashing at a grandparent’s house:
OXO Tot Mash Maker Baby Food Mill ~$29
This little contraption is a hand-held manual food mill that works in a crank fashion. It’s decent, but we don’t recommend it as a primary device if you’re going “all in” on homemade baby food. Instead, we think it’s handy for travel or if you plan to make your own baby food only periodically. But it’s not going to give you that super-silky puree that you’ll get from an electronic device. To give an analogy, think of it as the manual breast pump of pureeing devices.

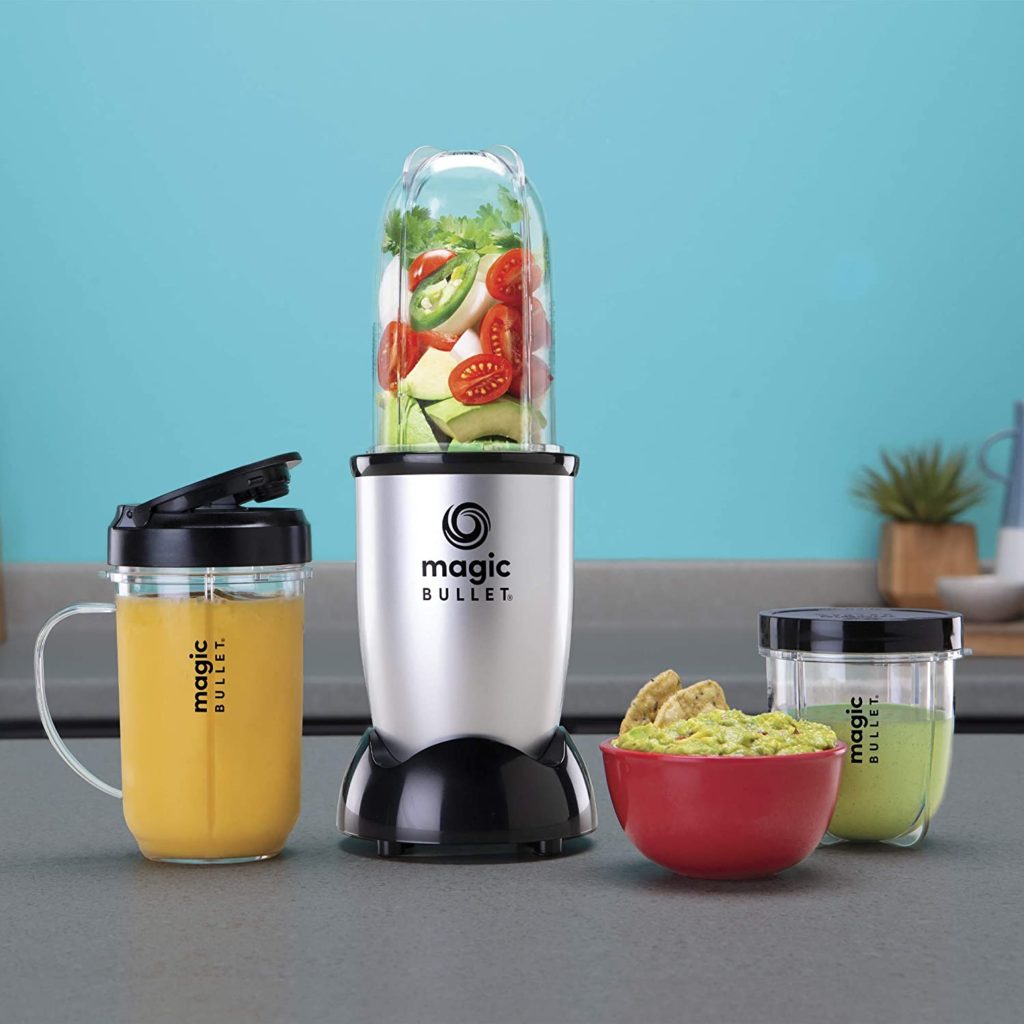
The Original Magic Bullet ~$37
This is what I used, and it’s decent, though somewhat finicky. You have to shake up the container periodically to really get “the blend,” and given the size of the containers you can’t puree a ton at once — but it’s a budget-friendly option that does the trick.
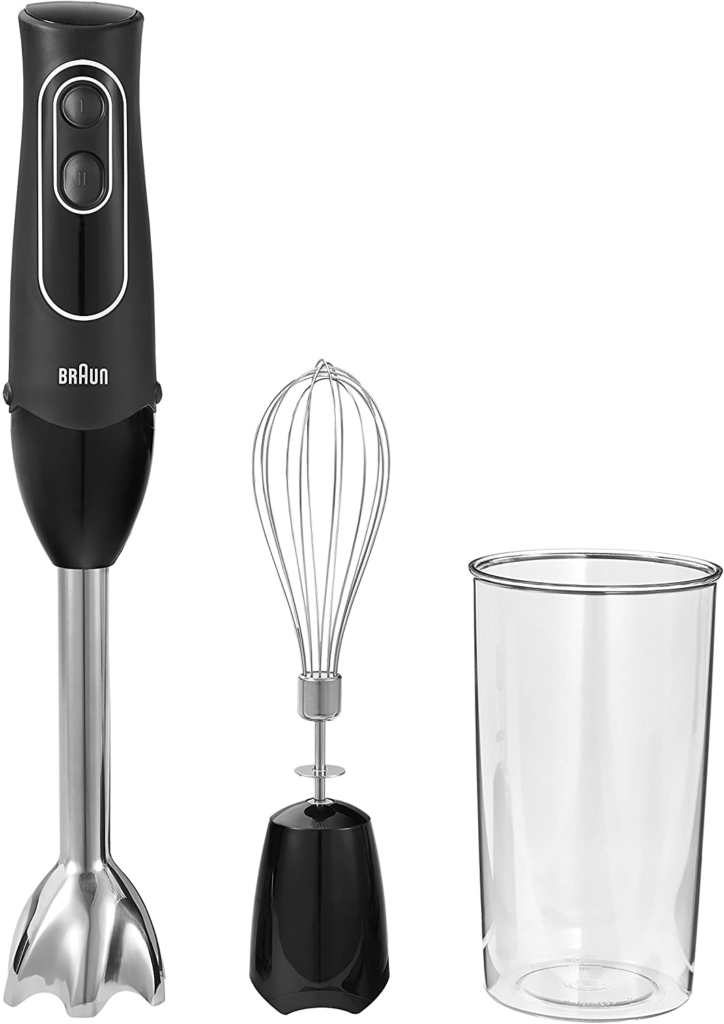
Braun MultiQuick Immersion Hand Blender ~$64
An excellent and truly versatile option. This 2-speed hand-held blender is super easy to use and surprisingly powerful. (Note — you do have to hold the power button down continuously to operate.)
Solid Choices ~$$
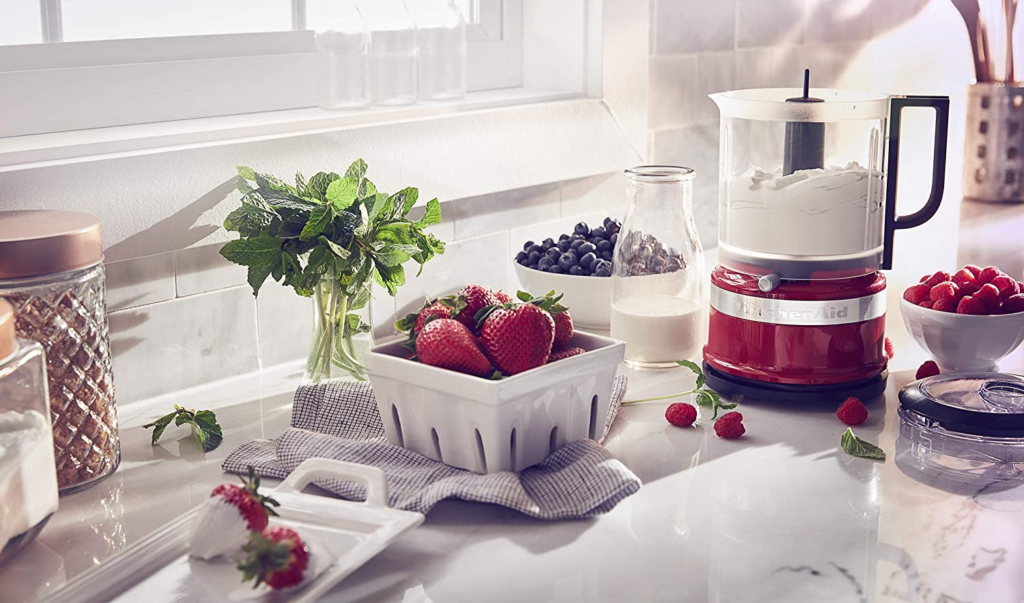
Kitchenaid Mini Food Processor ~$54
This little sucker from one of the most trusted brands in food prep has a five-cup capacity, plenty of power, and also isn’t too loud. If you know you want a food processor, it’s a great choice.
Nutribullet Blender ~$79
A fantastic, full-size countertop blender.

Splurge-worthy ~$$$
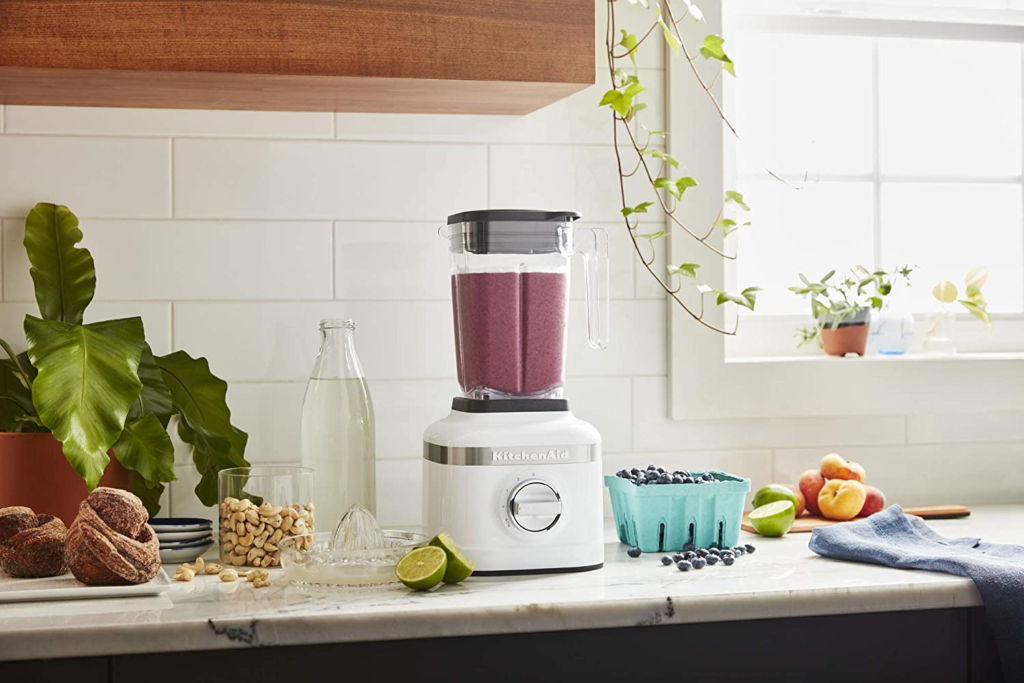
Kitchenaid K150 Blender ~$199
The sleek and vintage-looking (though new) countertop blender from the beloved Kitchenaid. (Is it just me, or does the aesthetic remind anyone else of Mad Men?) It has 3 speeds, is easy to clean, and is a powerhouse of a machine.
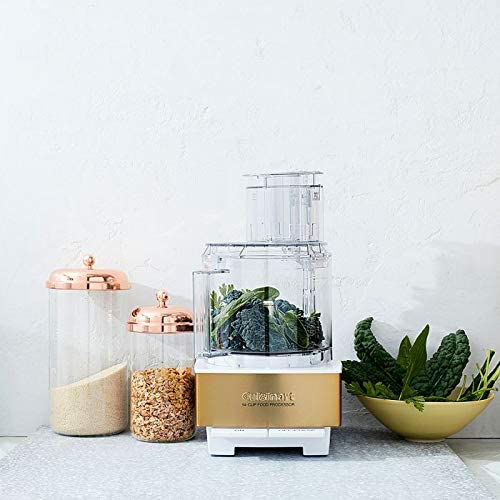
Cuisinart Food Processor ~$220
Easy to use, doesn’t leak (this is a common problem, I’ve found, with food processors — and it is particularly a problem when you’re blending liquidy things), and reliable.
Charlene’s Experience and an All-in-one Baby Food Maker Option:
Beaba Babycook Baby Food Maker ~ $159
I used the Ninja blender with my firstborn, but I had a really hard time with portions (always made too much) and with storage (had no freezer room to store). So with our second child, we opted for the Beaba, and I felt like I had so much more control over how much food I was making. Not only that, but it made baby food prepping easy. With the Babycook, I was able to steam, cook and blend ingredients all in one place — in less than 15 minutes. I really appreciated not having to transfer the food from one container to another to blend it.
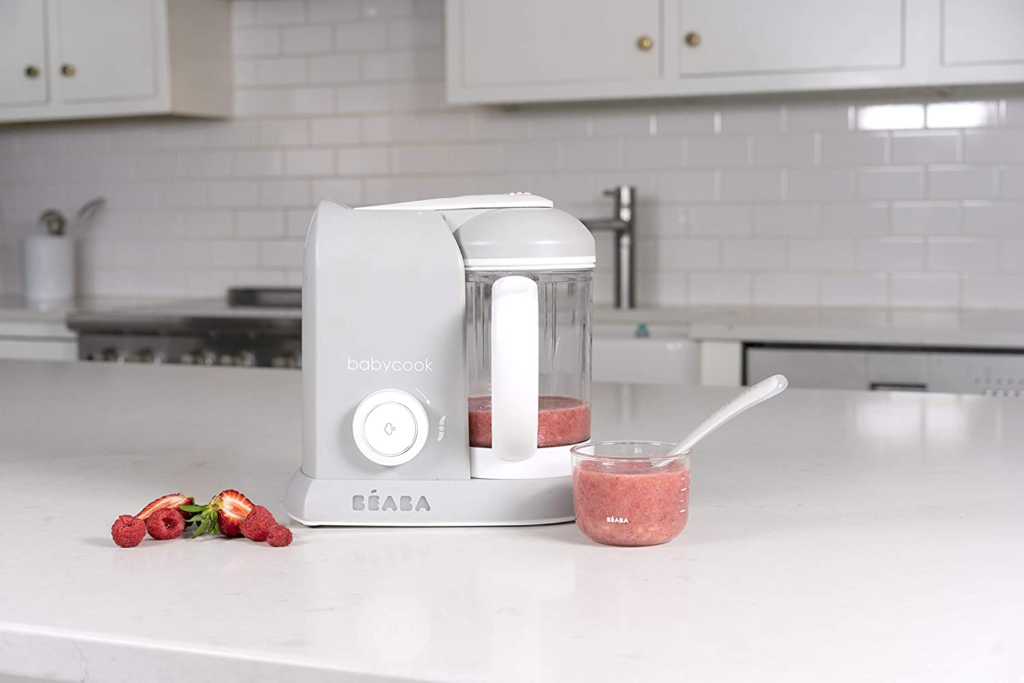
Note: the brand came out with a glass version (for $100 more) right when I was about done using the Babycook.
Storage Supplies:
*This is where the magic’s at, friends.
Freezer Trays:
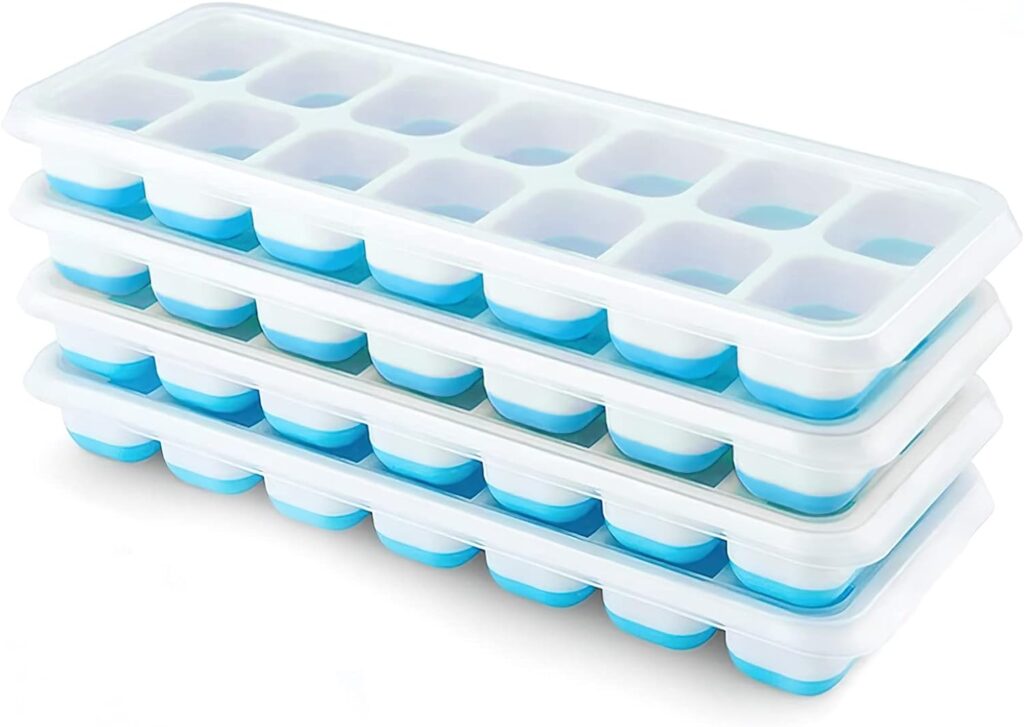
“Regular” Ice Cube Trays ~$12
I used plain, unadorned ice cube trays for making baby food and it’s honestly what I’d recommend. (No need to get fancy with it.) This 4-pack of ice cube trays has flexible silicone bottoms (to pop cubes free — don’t do “the twist”) and a plastic top, along with (moderately) sealable lids. Trays are BPA free and dishwasher safe, and they come with great customer service.
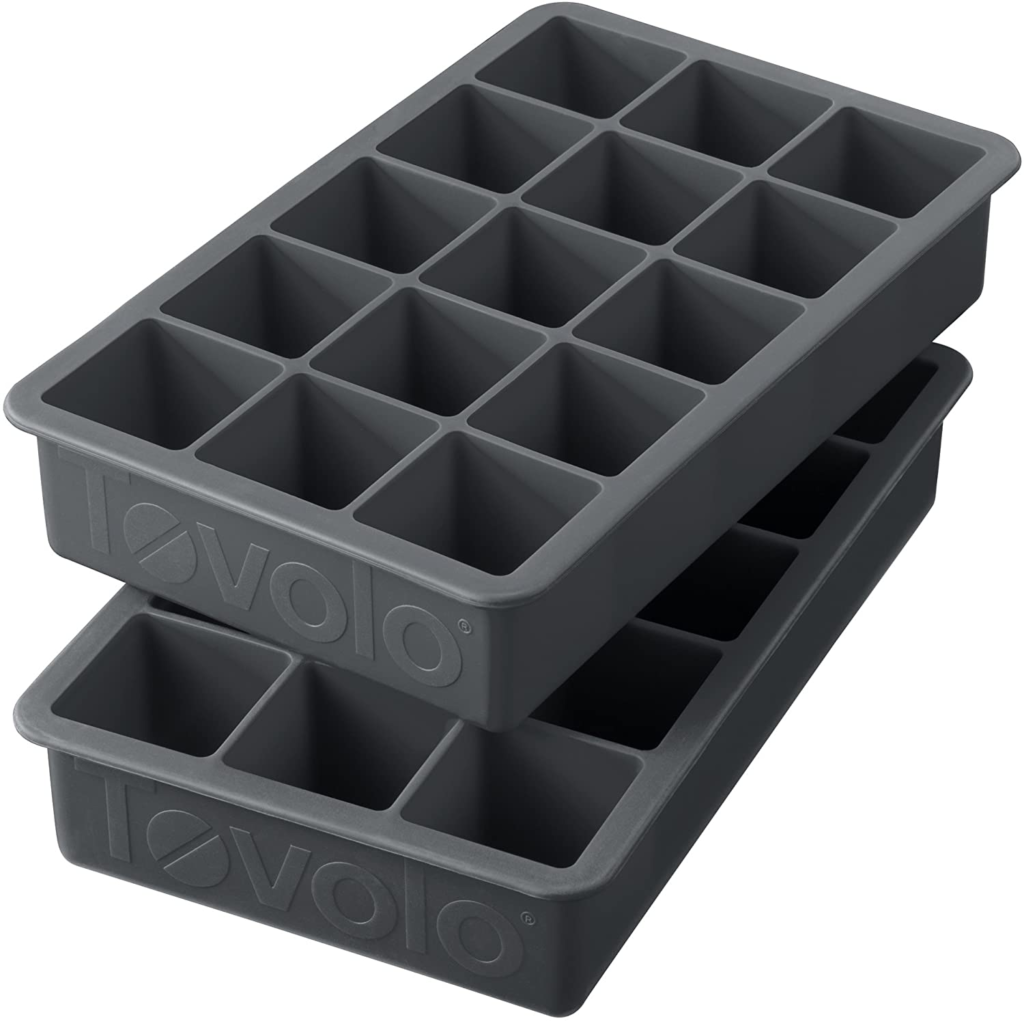
Tovolo Perfect Ice Mold Freezer Trays ~$15
This set comes with two silicone trays, each of which contains 15 true-to-form square cubes. These offer the option of slightly increased portions, if you want that. Dishwasher safe… And you can use it for extra-fancy cocktail ice cubes later on. 😉
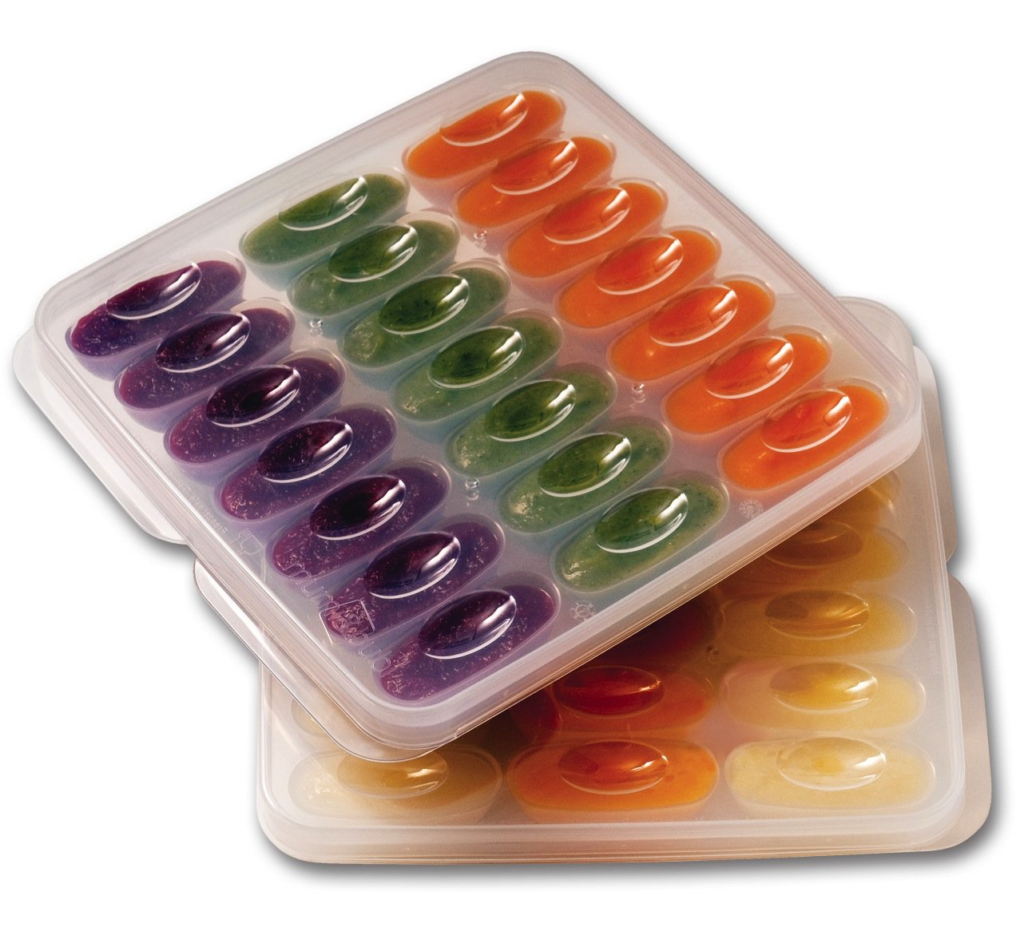
Mumi & Bubi Freezer Trays with Lids ~$25
These are a long-time parent favorite — a set of two trays with 21 rounded “cube” inserts each (one cube will hold 1 oz. of food). Some parents love the circular design for making it easy to remove food one cube at a time, while others complain that it’s inconvenient since you can’t “crack” the tray to remove all the cubes in one fell swoop. It’s a nice product (and is dishwasher safe), and we certainly recommend it, though it’s on the pricier side. Also it comes with access to an ebook with some two dozen+ recipes to help you get started.
Individual Serving Storage Containers:
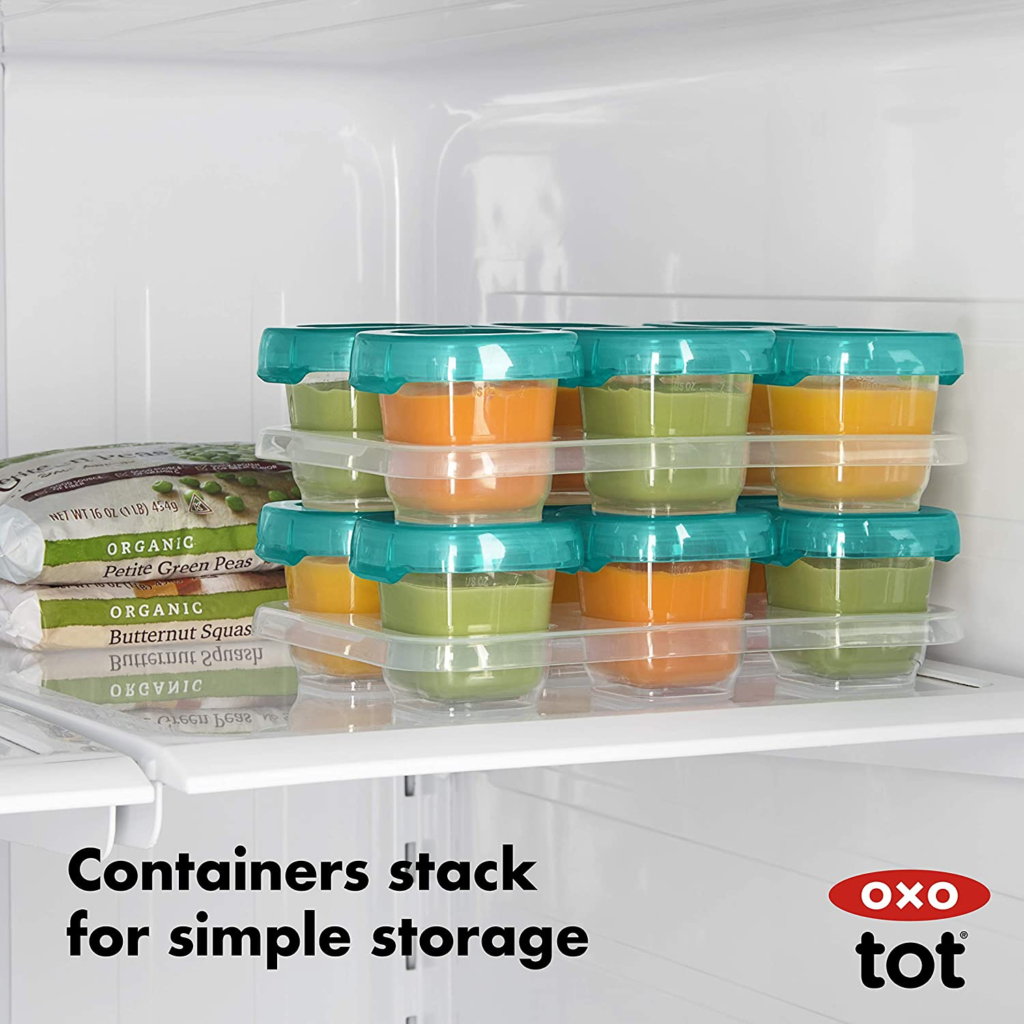
OXO Tot Baby Blocks Food Storage Set ~$11
This tray comes with 6 individual capped containers, which are perfect for storing purees in the fridge or for defrosting individual cubes of frozen food. *OXO advertises these as freezer safe, but we don’t recommend using them for freezer storage, because people seem to have a big problem with the containers shattering after being frozen. Best to stick to the fridge. Bonus: you can use these down the road for packing snacks and lunch boxes (it seems so far away, I know, but it will happen sooner than you think…).
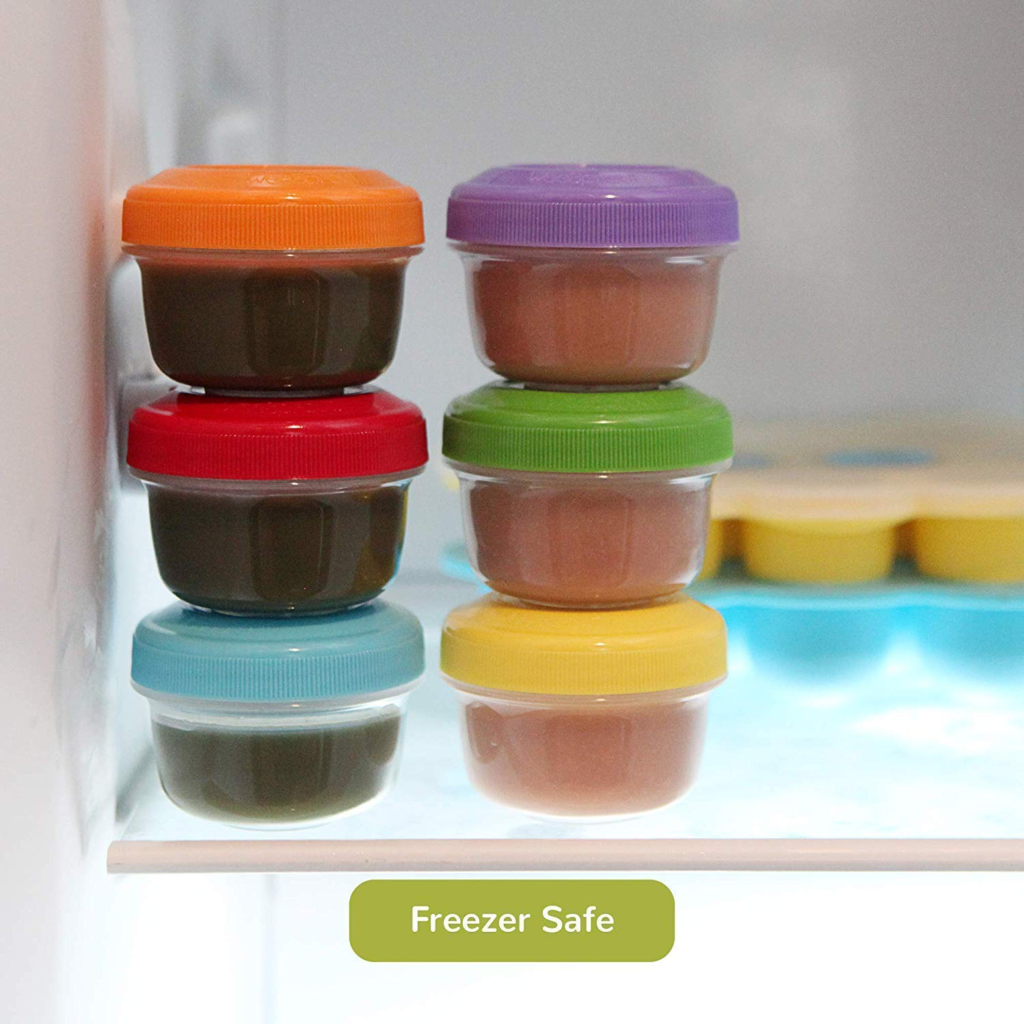
WeeSprout Storage Containers ~$19
This 12-pack of 4 oz. jars with screw on lids are perfect for storing purees in the fridge and, much like the OXO Tot set, will last you well into the future, doubling as a snack container. We still use these all the time for yogurt, nuts, berries, etc. You can also opt for the glass version of the same product (~$30). *If we had to pick, these WeeSprout containers are our fave.
On pouches — because now you can buy reusable pouches for homemade purees: Experts have raised some concerns about the overreliance on baby food pouches these days, and we think they make some pretty darn good points. The basic idea is that if you use pouches excessively, babies miss out on a lot — the process of learning to eat helps build fine motor skills, expands sensory development, and lets them experience the culture of dining. The oral mechanics of eating from utensils, chewing (well, gumming) and swallowing are totally different from sucking a puree from a pouch. (As one expert said, “eating” from a pouch is more like drinking than eating.)
Now — that’s not to say you can never use pouches. Of course you can. (They can be a lifesaver when you’re traveling, for example.) We just suggest using them judiciously — and making sure that your baby learns to eat from a spoon first.
Baggies
Technically, you can use Ziploc Freezer Bags (I’m sorry to confess this is what I did), but in the interest of sustainability, there are much better, eco-friendly options available now:
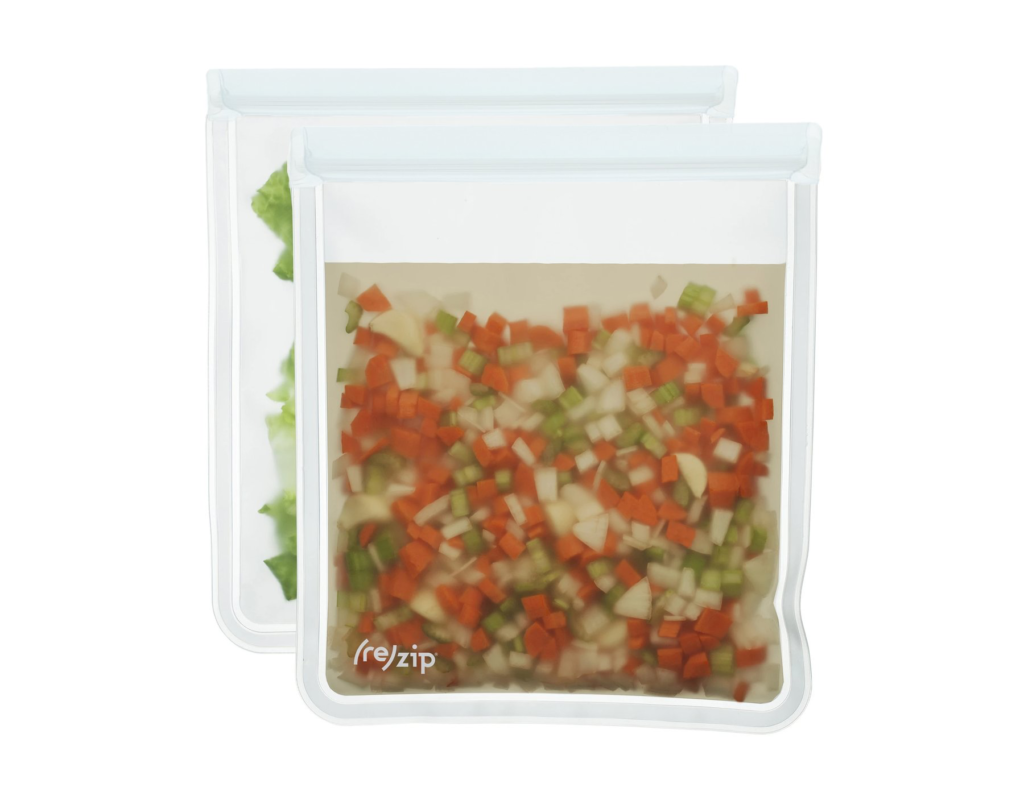
(re)zip Reusable Gallon Storage Bags ~$25 for 4
These have a great seal and are very durable, though they can be a bit of a pain to wash (because you have to hand wash them). Lies flat.
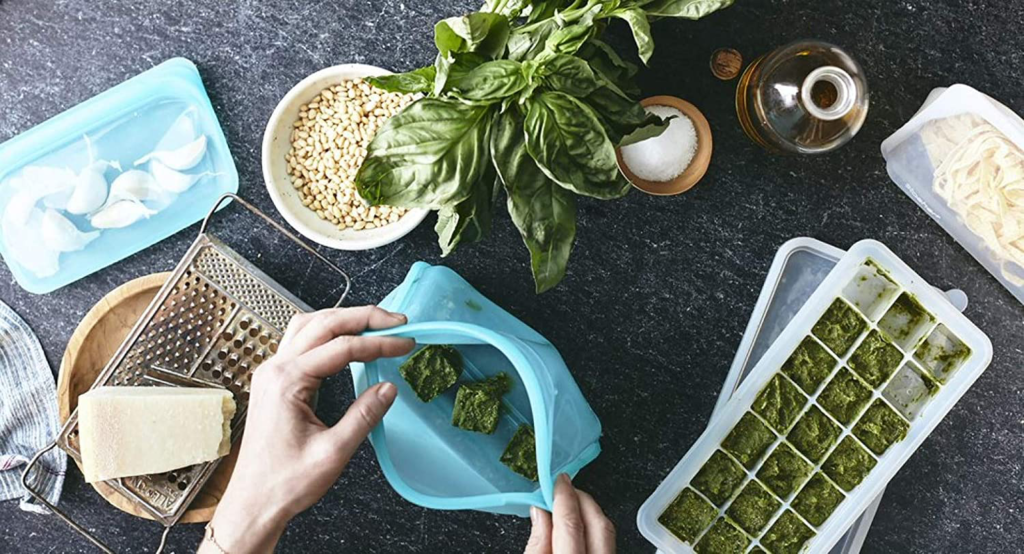
Stasher 56 oz. Reusable Storage Bag ~$24
These are an investment, but they’re the creme-de-la-creme of reusable bags. They’re built to last, are dishwasher and microwave safe (you can even put them in an oven up to 400 degrees and throw them in boiling water!), and stand up for easy use. A high-quality option.
BTW, one gallon is equivalent to 128 oz. ^^
Summing Up What You Need to Make Homemade Baby Food:
*Most of this stuff is optional — you can take or leave what you will. As long as you have something to cook it, puree it, and store it, you’re good to go. And have fun with this stage, because before you know it you’ll be on to the next thing. ☺️
Let us know what works for you!

Link is broken for regular ice cube trays